
Posted on June 4, 2003
Introduction
|
Just when you thought it was safe....out rolls another Humidor project. This one I will call "V" because I use the V8000 board. I'm sure the V means value and that was my goal as well in this design. I had been struggling with cooling issues with the M project and the Mini-Me project so I was glad to get back to the cool running 800MHz board. There really is a big difference in heat, and subsequently, noise between the M and V series. The great capabilities of the M are wasted on my target customer, the cyber-challenged executive.
Whereas everything I have built before this has been a toy for me, this time I was going to build a commercial piece. Something I intend to sell, and while I'm at it I might as well build ten of them. I turned my small office building into a HumidorPC factory. It was great fun and challenging too. I built these ten units factory style. I broke the design into modules, identified each individual task, checked my credit card balance and then commenced to build. I worked many long hours at this job, enough to have my wife complain about my absence. Then she found out how much money I had spent. Next thing you know, she's waking me up early saying "shouldn't you be over in your shop working?" Amazing.
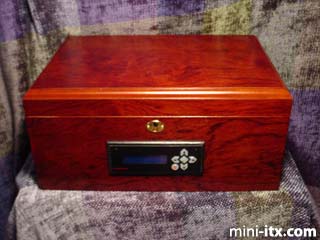
The Humidor V
Dirty details:
• VIA EPIA V8000 motherboard w/800MHz
C3 processor
• 256 MB PC133 SDRAM
• 20GB Toshiba Notebook HD w/ Fluid Dynamic Bearings
• 90W ACBEL PSU
• ThermalTake Active Memory Cooler
• Vantec 60mm Stealth cooling fan
• 100ct Milano Cigar Humidor in oak, cherry and rosewood
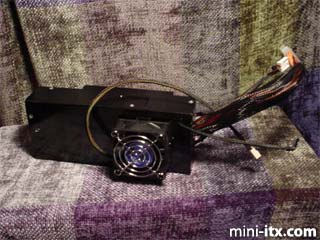
The power supply module. Vantec Stealth fan replaces noisy original cooling fan. The PSU was torn apart, taped up in the inside to keep out over spray, and painted, sanded, painted, sanded, painted......
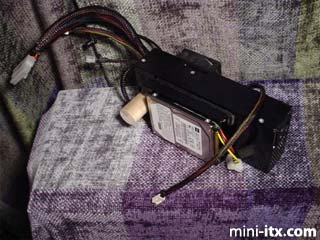
Bottom of PSU module showing the hard drive attached. When mounted, the hard drive is placed in a way that it receives direct incoming cool air. The round wooden dowel is a round wooden dowel. I call it the foot. It supports the PSU module and allows it to expand and contract. I designed all metal to wood interfaces to be able to control thermal expansion.

Primitive assembly line. The motherboard modules get their memory, memory coolers and cable sleeving here.
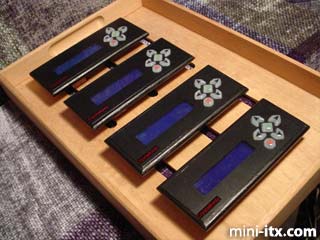
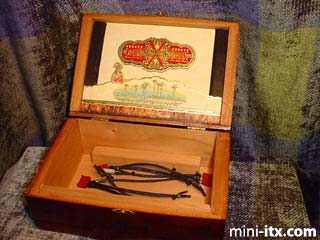
Control panel module. My latest innovation. It was prompted by the fact that I had no "proper" power/reset switches. My previous Humidors had a switch hidden inside the box. This is where I want to thank Brent and the guys at crystalfontz. I had a good experience with the 632 model on the Humidor M. People at CES2003 were mesmerized by the scrolling text display. The 633 model not only has a keypad but it has ATX power control, fan speed control, and temperature sensing. I built these modules by fabricating the mounting and cutting down the stock Lexan faceplates. Sanded, painted, sanded.....
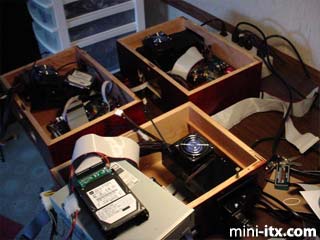
Back to the assembly line. I felt an incredible need to unionize and threaten to strike.
Components built in advance were stored in Spanish cedar cigar boxes in order to acclimate them. These are custom ATX harnesses made by Crystalfontz and sleeved by me.
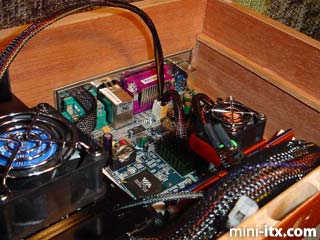
Nice inside shot showing the I/O plate mounted into the back of the piece. This is where I would like to thank Greg at Creative Cabinetry in Gainesville, Florida. He is a master cabinetmaker and did a wonderful job cutting out all the holes in the humidors.
 |
 |
 |
Quick Links
Mailing Lists:
Mini-ITX Store
Projects:
Show Random
Accordion-ITX
Aircraft Carrier
Ambulator 1
AMD Case
Ammo Box
Ammo Tux
AmmoLAN
amPC
Animal SNES
Atari 800 ITX
Attache Server
Aunt Hagar's Mini-ITX
Bantam PC
BBC ITX B
Bender PC
Biscuit Tin PC
Blue Plate
BlueBox
BMW PC
Borg Appliance
Briefcase PC
Bubbacomp
C1541 Disk Drive
C64 @ 933MHz
CardboardCube
CAUV 2008
CBM ITX-64
Coelacanth-PC
Cool Cube
Deco Box
Devilcat
DOS Head Unit
Dreamcast PC
E.T.PC
Eden VAX
EdenStation IPX
Encyclomedia
Falcon-ITX
Florian
Frame
FS-RouterSwitch
G4 Cube PC
GasCan PC
Gingerbread
Gramaphone-ITX-HD
GTA-PC
Guitar PC
Guitar Workstation
Gumball PC
Hirschmann
HTPC
HTPC2
Humidor 64
Humidor CL
Humidor II
Humidor M
Humidor PC
Humidor V
I.C.E. Unit
i64XBOX
i-EPIA
iGrill
ITX Helmet
ITX TV
ITX-Laptop
Jeannie
Jukebox ITX
KiSA 444
K'nex ITX
Leela PC
Lego 0933 PC
Legobox
Log Cabin PC
Lunchbox PC
Mac-ITX
Manga Doll
Mantle Radio
Mediabox
Mega-ITX
Micro TV
Mini Falcon
Mini Mesh Box
Mini-Cluster
Mobile-BlackBox
Moo Cow Moo
Mr OMNI
NAS4Free
NESPC
OpenELEC
Osh Kosh
Pet ITX
Pictureframe PC
Playstation 2 PC
Playstation PC
Project NFF
PSU PC
Quiet Cubid
R2D2PC
Racing The Light
RadioSphere
Restomod TV
Robotica 2003
Rundfunker
SaturnPC
S-CUBE
SEGA-ITX
SpaceCase
SpacePanel
Spartan Bluebird
Spider Case
Supra-Server
Teddybear
Telefunken 2003
TERA-ITX
The Clock
ToAsTOr
Tortoise Beetle
Tux Server
Underwood No.5
Waffle Iron PC
Windows XP Box
Wraith SE/30
XBMC-ION