
Posted on September 20, 2002
Introduction
Console fanatic Flagon500 (not his real name - we hope) has got every console under the sun, but so far all attempts to assimilate Nintendo's First Born into his collection has resulted in a rather inert pile of grey bricks. So one day he attacked one with his dremel, swapped out the lifeless innards with an EPIA 800, figured how to interface with the NES controllers, installed some emulation software and made... um... a NES. Read how he did it here (including how he persuaded the EPIA 800 to talk to his NES controllers with the aid of a soldering iron). Then look at 50+ images in the NESPC Gallery.
|
|
|
So when will someone interface Nintendo's R.O.B robot into their Mini-ITX conversion? In fact, while we're on the subject...
"Things we want converted into Mini-ITX"
1. Big
Trak
2. Speak and Spell
3. Simon
4. Etch-A-Sketch
5. Game and Watch (bonus point)
6. Full-Size
Mini-ITX powered R2-D2 (two bonus points)
Do you have a Mini-ITX based project we should be seeing here? Contact us at feedback@mini-itx.com with details, you'll win a delicious case badge.
Contents
I was tired of the blinking screen on my TV whenever I powered up my beloved NES. I would clean the connector, and blow until I was dizzy, but the blasted thing still would not work. I bought quite a few of them for less than $5 at Good Wills, but most of them never worked.
I can't stand emulators because you have to watch the game on your computer screen. I wanted to play my games with original NES controllers on my TV.
First I went looking for a way to connect
NES controllers to a computer. I found several sites with
diagrams for connecting to the parallel port. I ended up using
something called PSX Gamepad for the driver, but there are
others. The most confusing part was how to wire the damn things
up. There was no consistency as to how the pins were numbered.
Here is a junk diagram to show you how my pin numbers went.
This is from the perspective of looking at the back side of
the connectors. This is what you see when you are soldering:
|
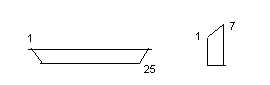
Parallel Port <--> NES
2 <-- 6
3 <-- 5
4-9 <-- 1
18-19 <-- 7
10 <-- 4
If you have more controllers, pins 1,5,6,7 all go to the same port for each controller. Pin 4 is the only one that changes and it goes on the pins following 10 (11, 12, etc). On pins 4-9, you are supposed to have diodes which allow current to go to the controller, but not backwards. You can use the cheapest ones that Radio Shack sells for this.
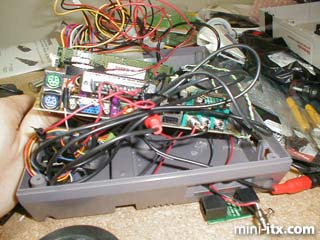
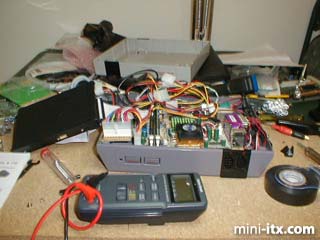
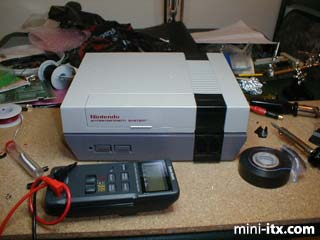
Now that you have the controller(s) all wired up, install your software, and go into the control panel and see if it works. If it doesn't, you probably are not getting enough voltage out of your parallel port. Check it with a voltmeter. I was getting something like 4.2 volts, so I had to search for another source. Hard drives have a +5v, so I tapped into that. So my pin 1 on the NES went to the +5v (red) on my hard drive line, and my pin 7 on the NES went to the ground (black) on the hard drive. This picture attempts to show the mess of wires that was created because of this:
|
OK. Now that we have the controllers working, we need a way to play the games. The only emulator I could find that supported my controllers was RockNES, so the choice was easy for me. There are probably others, but who cares, this one works. The only thing I don't like is that I cannot select games with the controller - you need a mouse or a keyboard.
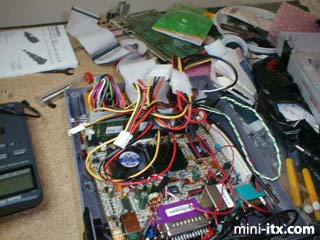
Now we have a working system that plays games. It is now time to cram the computer into little NES box. For this I used the EPIA 800 main board. It's super small and has on board TV-Out, Sound and Network (among other things). I added 256MB ram, 20 GB hard drive and installed Win2K. This board can use a normal ATX power supply. I did not have room for one, so I searched for an external one. The Morex Cubid 2677 has an external powersupply. Instead of figuring out where they got theirs from, I just bought the case and stripped out the power supply.
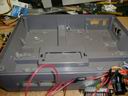
Next comes the fun part. Buy a cheap broken NES and gut it. Then take the dremmel and cut everything except the 4 screws in the corners.
|
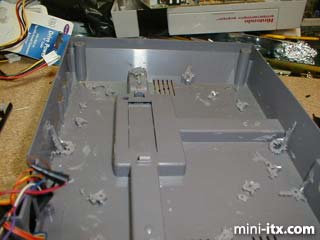
In the NES case, you need a spot to plug in the power supply, audio out, video out, and a network port. You also need the parallel port wired directly to the controller ports. And, you need the NES's power button to turn the whole thing on. The original NES power button locks in place (AT Style). Since this is an ATX board, I just wired the reset button of the NES to the power input of the board.
Connecting the joystick and power cables:
|
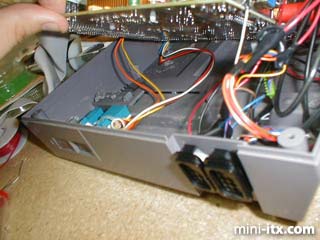
Connecting the Sound and Video:
|
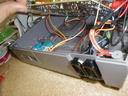
The Motherboard and the PSU fitted nicely in to the bottom of the NES. But I couldn't figure out how to mount the hard drive. I wanted it to just sit on top of the board, but it might short something out that way. Then I got a brilliant idea, I'll just wrap the bottom of the drive with electrical tape...
|
Now its time to put the lid on and test it out. I was too excited to properly mount the external ports, but who cares, I'll save that for a day when the power goes out - I want to play some games!
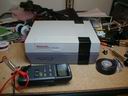
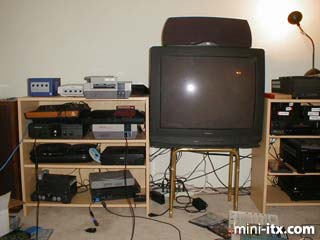
It looks nice with my others:
|
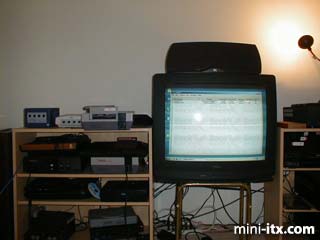
Booting up
|

Select Game
|
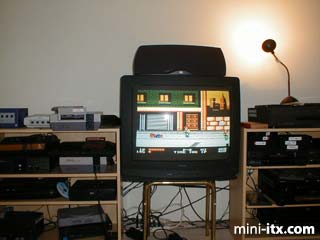
Double Dragon!
|
A few side notes... I had to put it under my Master System because in all my excitement I lost the screws! I think I should add another fan because it might get hot in there.
The finished product.
|
 |
 |
 |
Quick Links
Mailing Lists:
Mini-ITX Store
Projects:
Show Random
Accordion-ITX
Aircraft Carrier
Ambulator 1
AMD Case
Ammo Box
Ammo Tux
AmmoLAN
amPC
Animal SNES
Atari 800 ITX
Attache Server
Aunt Hagar's Mini-ITX
Bantam PC
BBC ITX B
Bender PC
Biscuit Tin PC
Blue Plate
BlueBox
BMW PC
Borg Appliance
Briefcase PC
Bubbacomp
C1541 Disk Drive
C64 @ 933MHz
CardboardCube
CAUV 2008
CBM ITX-64
Coelacanth-PC
Cool Cube
Deco Box
Devilcat
DOS Head Unit
Dreamcast PC
E.T.PC
Eden VAX
EdenStation IPX
Encyclomedia
Falcon-ITX
Florian
Frame
FS-RouterSwitch
G4 Cube PC
GasCan PC
Gingerbread
Gramaphone-ITX-HD
GTA-PC
Guitar PC
Guitar Workstation
Gumball PC
Hirschmann
HTPC
HTPC2
Humidor 64
Humidor CL
Humidor II
Humidor M
Humidor PC
Humidor V
I.C.E. Unit
i64XBOX
i-EPIA
iGrill
ITX Helmet
ITX TV
ITX-Laptop
Jeannie
Jukebox ITX
KiSA 444
K'nex ITX
Leela PC
Lego 0933 PC
Legobox
Log Cabin PC
Lunchbox PC
Mac-ITX
Manga Doll
Mantle Radio
Mediabox
Mega-ITX
Micro TV
Mini Falcon
Mini Mesh Box
Mini-Cluster
Mobile-BlackBox
Moo Cow Moo
Mr OMNI
NAS4Free
NESPC
OpenELEC
Osh Kosh
Pet ITX
Pictureframe PC
Playstation 2 PC
Playstation PC
Project NFF
PSU PC
Quiet Cubid
R2D2PC
Racing The Light
RadioSphere
Restomod TV
Robotica 2003
Rundfunker
SaturnPC
S-CUBE
SEGA-ITX
SpaceCase
SpacePanel
Spartan Bluebird
Spider Case
Supra-Server
Teddybear
Telefunken 2003
TERA-ITX
The Clock
ToAsTOr
Tortoise Beetle
Tux Server
Underwood No.5
Waffle Iron PC
Windows XP Box
Wraith SE/30
XBMC-ION